
Have you ever opened your Excel file and found lots of the same information repeated? It happens to many of us! Having duplicate data can make your spreadsheet messy and hard to use.
But don’t worry!
This guide will show you three great ways to remove those annoying duplicates and make your Excel sheet neat again.
The guide starts by explaining what the problem is (duplicate data) and how it can be fixed (three methods). It’s like having a superhero for your data troubles!
The rest of the guide gives clear, simple steps for each method:
- It explains what “conditional formatting” is and how it helps find duplicates.
- It gives clear instructions for each method, making it easy to follow along.
- It suggests using screenshots to make things even clearer.
First, let’s understand how you can spot duplicates in Excel. Then, we’ll talk about removing those duplicates. We’ll show you three simple ways to do it.
Read More: Top 10 Excel Formatting Tips To Make Your Life Easier
How to find duplicates in Excel?
If you want to spot things that are the same so you can decide whether to get rid of them or not, the easiest way is to use conditional formatting. This tool will make all the duplicates stand out for you.
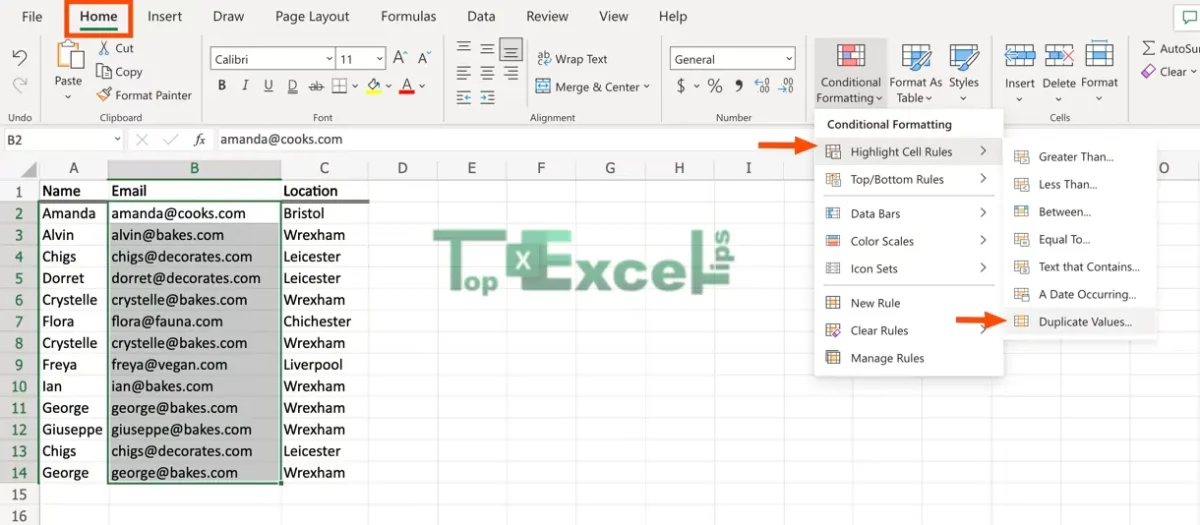
- First, select the data you want to check for duplicates. Then, go to the Home tab and choose Conditional Formatting > Highlight Cell Rules > Duplicate Values.
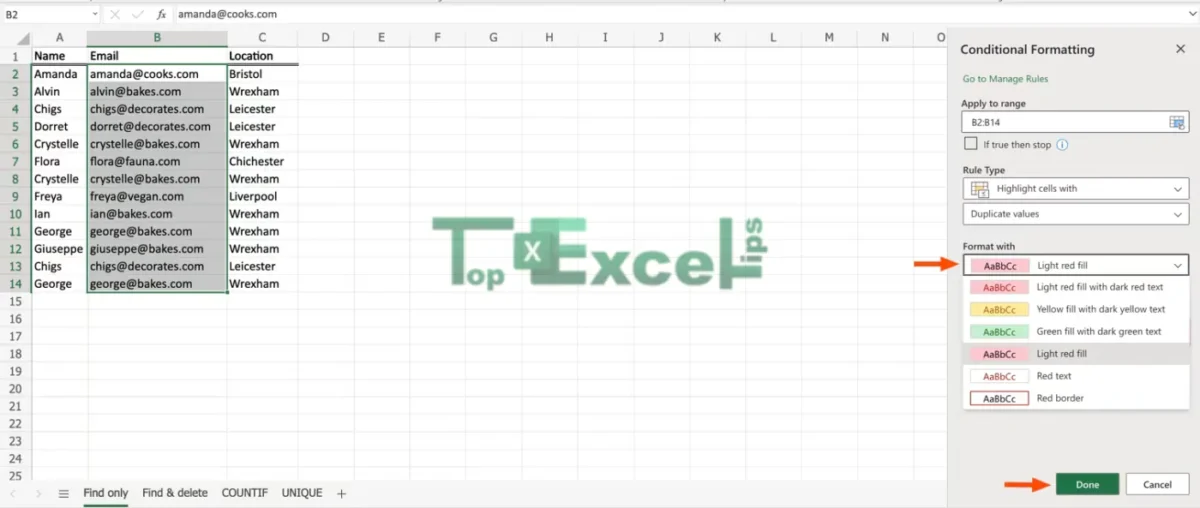
- A window will pop up. Pick a color scheme to highlight the duplicates. It’s best to choose a color that stands out, like light red. Once you’ve chosen, click Done.
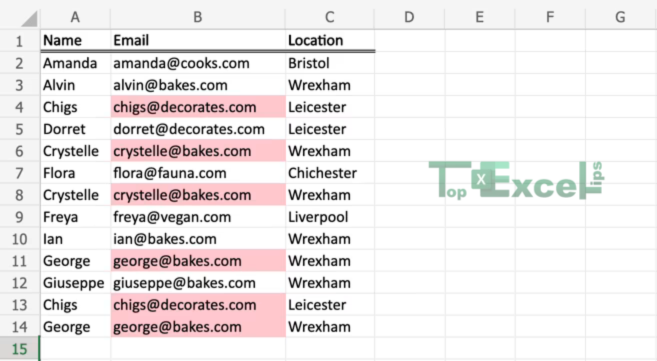
- Now, you’ll see the duplicate data highlighted. You can look through it and decide if you want to delete any of the duplicate information.
How to Remove Duplicates In Excel Using the Data Tab
Here are simpler steps to remove duplicate entries from a data table using the “Remove Duplicates” option on the Data tab:
Step 1: Choose Your Data
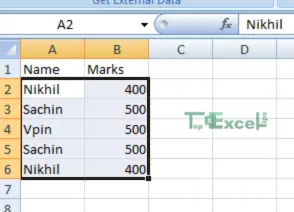
Open your Excel spreadsheet and pick out duplicate data.
Step 2: Use the Data Tab
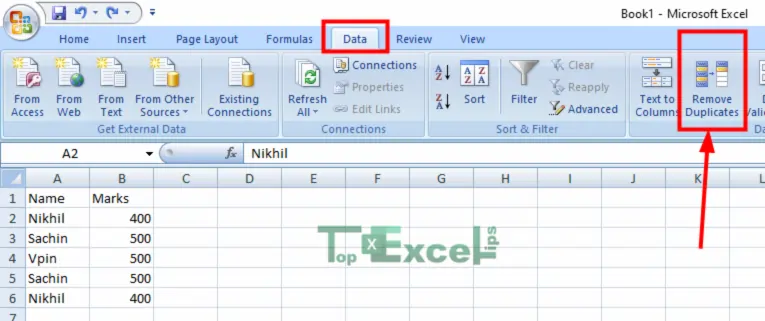
Find the Data tab on the toolbar and click on it. Then, choose the Remove Duplicates option.
Step 3: Pick Columns
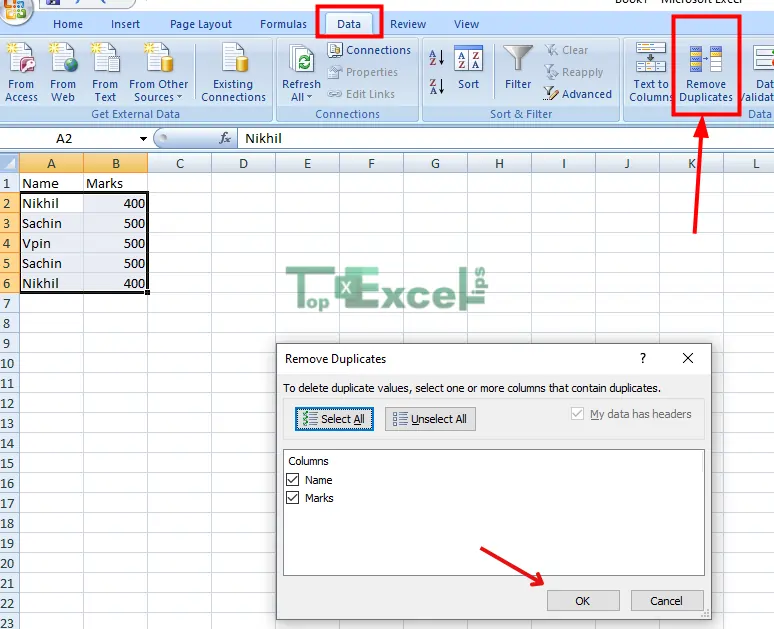
A window will pop up. Pick the columns where you want to remove duplicates. Click the OK button. For example, you might choose the “Name” and “Marks” columns.
Step 4: See the Changes
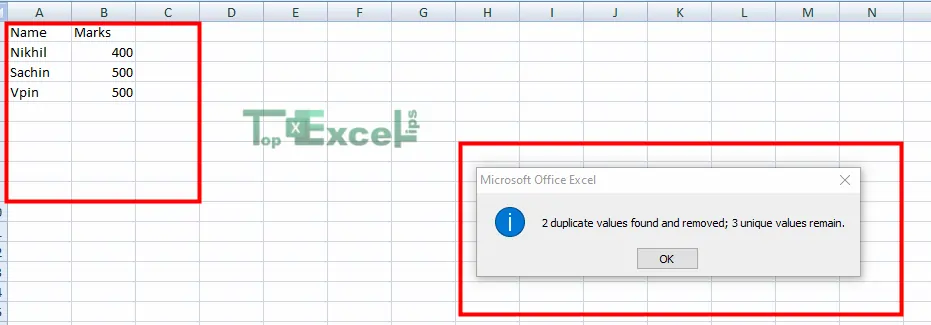
All the duplicate entries will vanish. You can check your sheet to see the changes.
How to Remove Duplicates Using the Advanced Filter Option
To get rid of repeated information from our data table in Excel, we can use the Advanced Filter tool. Here’s how:
Step 1: Choose the Data
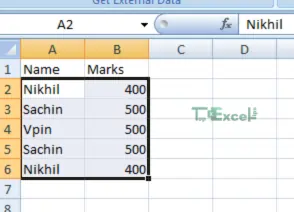
Open your Excel file and select all the duplicate information.
Step 2: Find the Advanced Filter
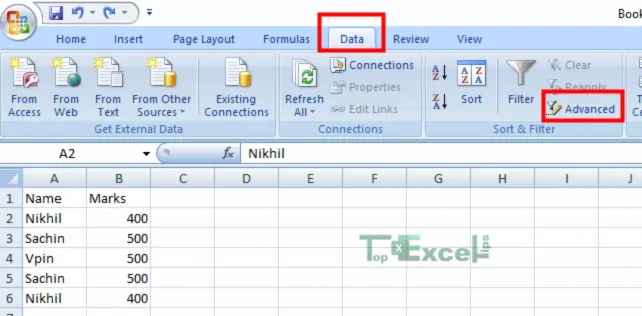
Go to the Data tab and look for the Advanced Filter option in the Sort and Filter section.
Step 3: Pick Only Unique Records
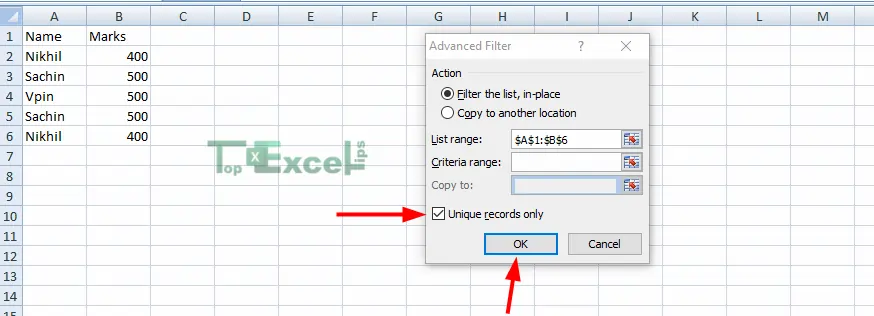
A small window will pop up. Check the box that says “Unique records only” and click OK.
Step 4: See the Duplicates Disappear
Now, all the duplicate entries will be gone.

How to Remove Duplicates Using the Power Query Tool
To get rid of repeating stuff in our data table using the Power Query Tool, follow these steps:
Step 1: Get to the Data Tab and Choose From Table
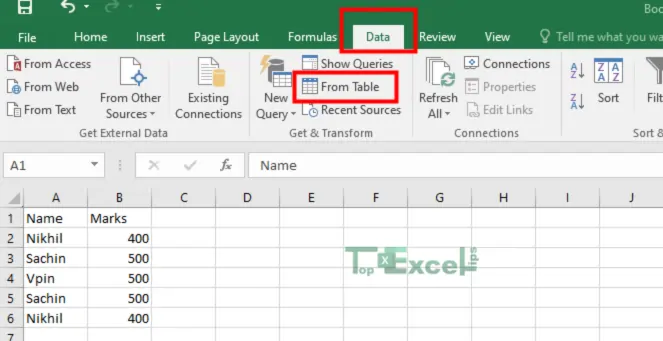
Click on the Data tab at the top, then pick the From Table option under Get & Transform.
Step 2: Confirm Table Has Headers
A window will pop up. Make sure to check the box that says My table has headers, then hit OK.

Step 3: Power Query Editor Appears
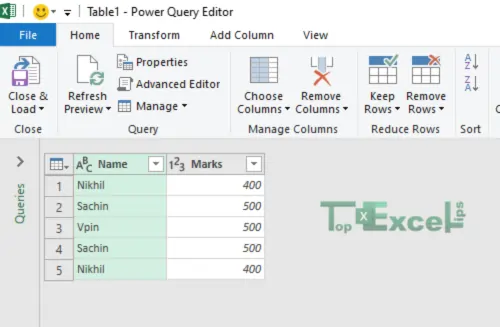
You’ll see the Power Query Editor on your screen.
Step 4: Head to the Home tab and Pick Remove Duplicates
Navigate to the Home tab and select Remove Rows. In there, choose Remove Duplicates.
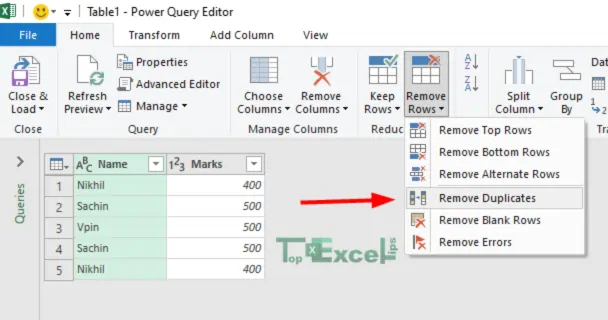
Step 5: Check Out the Removed Duplicates
Make sure all the duplicate values are gone by checking the preview.

Read More: How To Show Formulas In Excel: Simple & Easy Steps
Wrap Up
Here you go, data hero! With these three super-effective methods, you can easily eliminate duplicate data in your spreadsheet. This will make your spreadsheet neat and easy to understand.
You’ll be able to study your data with confidence and make the most of Excel. And remember, mastering duplicates is just one part of becoming an Excel expert.
Keep learning, and enjoy working with your spreadsheets!
FAQs
Do I need a formula to remove duplicates in Excel?
Nope, you don’t really need an equation for that, but you can use one if you want. Excel has a quick button under “Data” that can zap duplicates for you without fuss.
How to remove duplicate rows in Excel but keep one?
To remove duplicate rows in Excel and keep just one of each, go to the Data tab at the top. Then, in the Data Tools section, choose Remove Duplicates. A box will pop up; make sure all the columns are selected, then hit OK. This action will erase any repeated information, leaving only the distinct data behind.
What is the shortcut to remove duplicates from a column in Excel?
Excel can automatically get rid of any duplicate entries in the cells you choose. Instead of going through the menus, you can use the shortcut “Alt+A+M” to do this faster.


